Setup a self-hosted website
This step-by-step guide shows how you can setup your own self-hosted website. From topics like configuring a reverse proxy to managing dynamic DNS for your custom domain is all covered in this article.
2023-12-12
Preamble
- Rust installed (cargo)
- Uses Fedora (dnf, firewall-cmd)
Webserver
+-----------+                    +-----------------+     +------------------+
|  Browser  | --- (Internet) --> |  Reverse Proxy  | --> |  Website Server  |
|  (client) | <-- (Internet) --- |     (sozu)      | <-- |  (live-server)   |
+-----------+                    +-----------------+     +------------------+
Reverse proxy
Install Sōzu which serves as a reverse proxy.
Install required dependencies.
sudo dnf install protobuf-compiler
Install sozu via cargo.
cargo install sozu
Insert the following config into ~/.config/sozu/config.toml.
[%gclusters%n]

[%gclusters.website%n]
%fprotocol%n = %s"http"%n
%fhttps_redirect%n = %dtrue%n
%fanswer_503%n = %s"./503.html"%n

%ffrontends%n = [
    { %faddress%n = %s"0.0.0.0:80"%n, %fhostname%n = %s"example.com"%n }
]

%fbackends%n = [
    { %faddress%n = %s"127.0.0.1:4200"%n }
]
Create a new service file at /etc/systemd/system/sozu.service and insert the following configuration. Replace <user> with your username.
[Unit]
Description=Sozu - A HTTP reverse proxy, configurable at runtime, fast and safe, built in Rust.
Documentation=https://docs.rs/sozu/
After=network-online.target local-fs.target remote-fs.target time-sync.target
Wants=network-online.target local-fs.target remote-fs.target time-sync.target

StartLimitIntervalSec=10
StartLimitBurst=5

[Service]
Type=simple

RuntimeDirectory=sozu
PIDFile=/run/sozu/sozu.pid

ExecStartPre=/home/<user>/.cargo/bin/sozu config check --config /home/<user>/.config/sozu/config.toml
ExecStart=/home/<user>/.cargo/bin/sozu start --config /home/<user>/.config/sozu/config.toml
ExecReload=/home/<user>/.cargo/bin/sozu reload --config /home/<user>/.config/sozu/config.toml
Restart=on-failure

LimitNOFILE=65536

# Since systemd 229, should be in [Unit] but in order to support systemd <229,
# it is also supported to have it here.
StartLimitInterval=10
StartLimitBurst=5

[Install]
WantedBy=multi-user.target
This configuration was adapted from the example file of the Sōzu repository.
Enable and start the sozu reverse proxy with the systemctl command.
sudo systemctl daemon-reload
sudo systemctl enable sozu
sudo systemctl start sozu
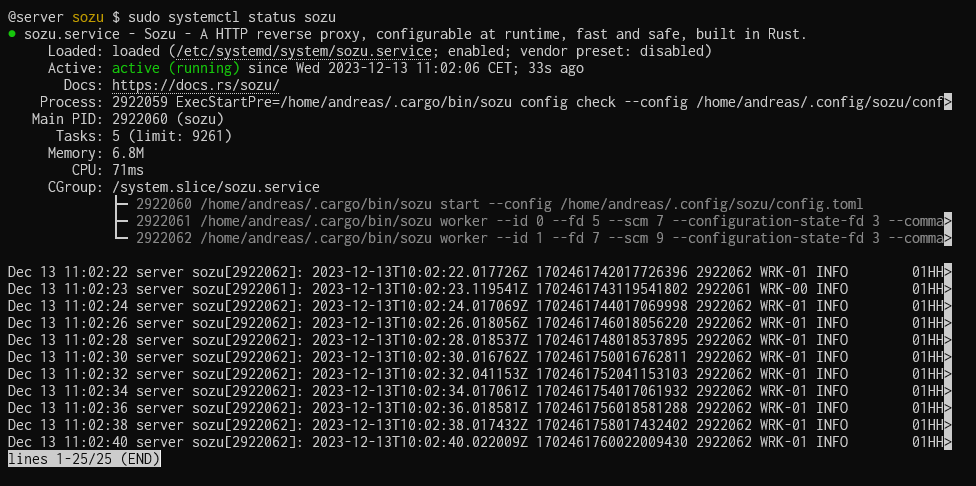
View the log and verify everything works and no errors are thrown.
sudo systemctl status sozu
Server
Install the live-server crate.
cargo install live-server
Create another service file at /etc/systemd/system/website.service. Replace <user> with your username.
Note that the port 4220 needs to match with the backend port of our Sōzu reverse proxy we previously configured.
[Unit]
Description=Website

[Service]
User=<user>
WorkingDirectory=/srv/website
ExecStart=/home/<user>/.cargo/bin/live-server -h 0.0.0.0 -p 4200

[Install]
WantedBy=multi-user.target
Perform a daemon-reload then enable and start the service as explained in the previous step.
Port forwarding
Fedora Firewall
Because Fedora has a built in firewall, we need to allow incoming traffic (Browser requests) for the ports 80 (http) and 443 (https).
The following commands show how to allow incoming traffic for port 80:
sudo firewall-cmd --add-port=80/tcp --permanent
sudo firewall-cmd --reload
You can view all allowed ports with the following command:
sudo firewall-cmd --list-ports
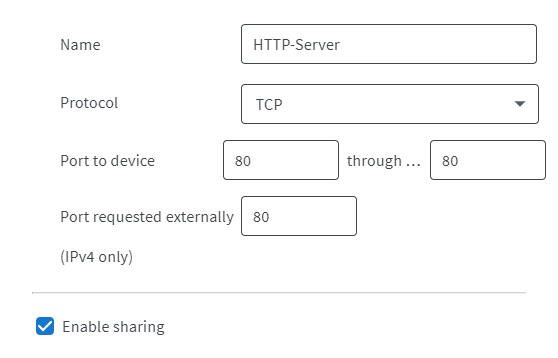
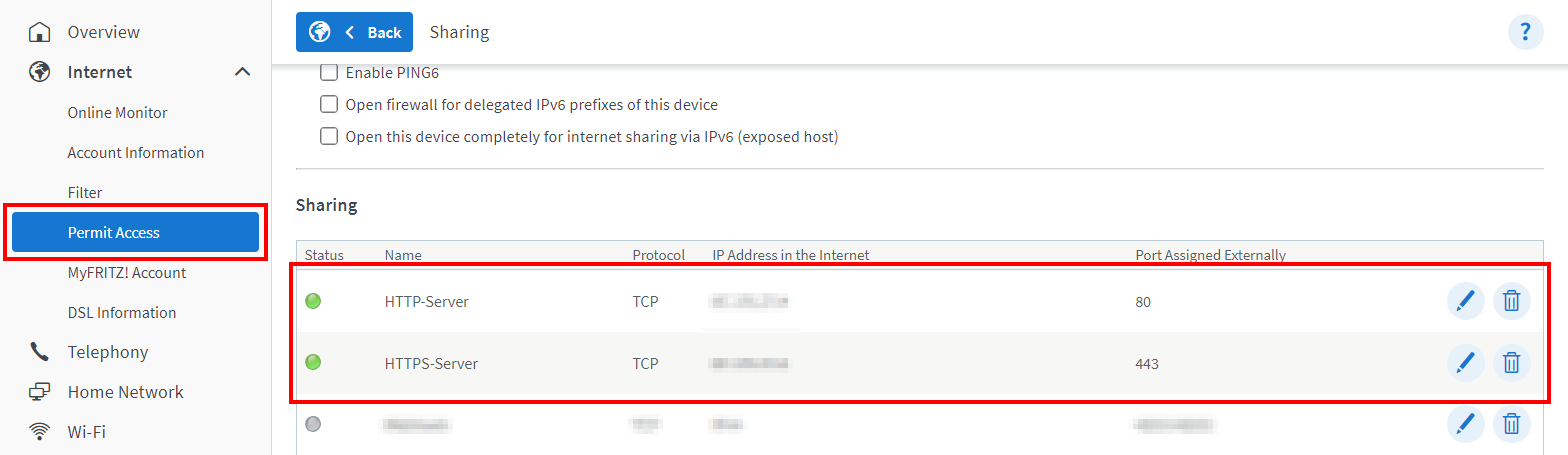
Router port forwarding
Enable port forwarding on your router.
Open your website in the browser with your public IP address and verifiy everything works.
You can get your public IP address from here checkip.amazonaws.com.
Domain
NOTE: Keep in mind, some domains are SSL only, which means you need a SSL certificate.
Dynamic DNS
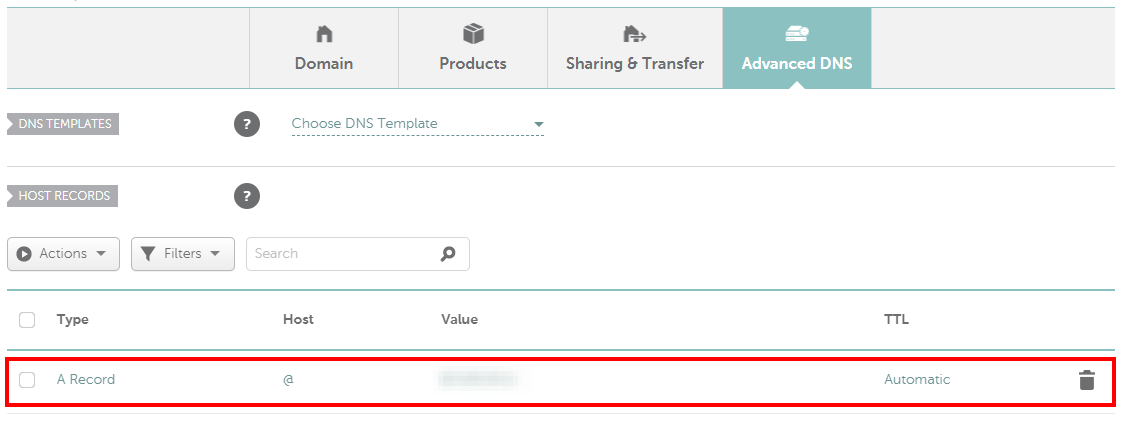
Because the public IP address changes (except you have a static IP address), we need a way to update the value of our A Record every time this happens. This is where Dynamic DNS comes into play.
In order to use dynamic DNS with our domain, we need to active this feature in the Advanced DNS section. After dynamic DNS was enabled, a password is shown underneath the toggle which we will later use to authenticate our update client.
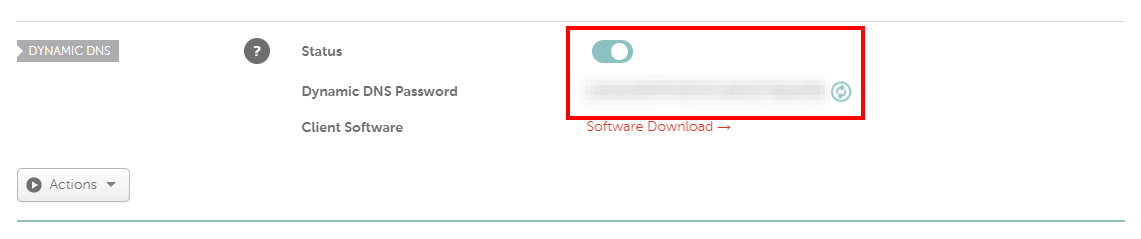
The next step is to install a updating client which notifies our domain provider about the address change. Instead of installing a random tool from the internet for this task, I build my own update client in Rust called dns-rs.
You can install the tool with the following command:
cargo install --git https://git.typable.dev/typable/dns-rs.git
After the tool was installed you can use the dns-rs command to execute it manually. But first we need to configure the client.
Configuration
Create a config file at ~/.config/dns-rs/config.toml and insert the following configuration template:
[%gprovider%n]
%fhost%n = %s"https://dynamicdns.park-your-domain.com"%n
%fpath%n = %s"/update"%n
%fargs%n = %s"domain=%%h&host=%%s&ip=%%i&password=%%p"%n

%c# %%h = host%n
%c# %%s = subdomain%n
%c# %%i = ip address%n
%c# %%p = password%n

%c# example.com%n
[[%gdomains%n]]
%fhost%n = %s"example.com"%n
%fpassword%n = %s"XXXXXXXX"%n

%c# test.example.com%n
[[%gdomains%n]]
%fhost%n = %s"example.com"%n
%fsubdomain%n = %s"test"%n
%fpassword%n = %s"XXXXXXXX"%n
%fupdate%n = %dfalse%n %c# check but don't update%n
The first section called [provider] tells the client where to connect in order to update the domain. The current provider config is configured for the Namecheap DNS updater.
Underneath you can see multiple domain entries, each of them with a host and a password, these fields are required.
The password field should match with the dynamic DNS password which was created during our dynamic DNS enabling process.
If you have subdomains which you want to update, you can simply add the subdomain property to your domain entry.
Automation
The last step is to automate the DNS updating process by using a cronjob.
For this, we create a new folder for the log files.
mkdir -p ~/log/dns-rs
Use crontab -e to edit your cronjobs and add the following line. Replace <user> with your username.
*/30 * * * * /home/<user>/.cargo/bin/dns-rs >> "/home/<user>/log/dns-rs/$(date +\%%Y-\%%m-\%%d).log"
This will execute the dns-rs command every 30 minutes and writes the output into a log file.
You can find more details about scheduling your cronjob here: crontab.guru
SSL Certificate
Request a free SSL certificate from Let's Encrypt with the certbot CLI tool.
sudo dnf install certbot
sudo certbot certonly